Showing posts with label Cooking. Show all posts

Wednesday, June 6, 2012

Apparently I Am A Slacker

How the heck has 3 months flown by since the last time I wrote a blog?  I seriously was intending to take just a short break, however I obviously was caught up in doing a whole lot of nothing! 

I've gotten a new gadget I will be reviewing within the next couple of days that is very cool.  Any kind of technology that is affordable and improves the quality of life is ok with me. 

I'm keeping my fingers crossed that in the near future I will be adopting a new little dog, because my big dog, Balue, needs a pet.  What?  Don't your pets have pets?

I decided to go on some dates after my year of dating break, and I decided that I hate dating.  More and more I see why arranged marriages make sense.  Now if someone could arrange for me to be with Thor that would be greatly appreciated.

I've cooked a bunch of super yummy stuff lately, and thought as I was doing it "I should be blogging this" but lacked the heart to feel like taking photos of the process.  But trust me there's been some good stuff going into my belly.

See, obviously a whole lot of nothing going on here.  Which I'm assuming it's better that I haven't mindlessly written about nothing daily for 3 months straight, like some kind of blog writing zombie who feeds on wasting your brain cells instead of actually feasting on your brain cells. NOM NOM NOM

Ok so now that you've gotten this far and finally realized this was a complete waste of your time, HAVE A WONDERFUL DAY!!

Much Love!


In light of I obviously like to disappear for months at a time I thought I would share with you this cute little Pintrest find....


And for wasting your time here's a song I love....


Wednesday, February 15, 2012

Homemade Strawberry Syrup

I woke up this past Saturday thinking I wanted pancakes.  However I did not have any syrup and I always wondered how it would taste homemade so I proceeded to read about 6000 recipes. I got the jist that the bulk of them used one part brown sugar, one part white sugar and one part water.  I had all of those things and some strawberries I needed to use up.  Swwwweeet! 

And sweet it was.  I had mixed the strawberries that I strained out of the syrup into the pancake batter and that was actually my mistake when it came to sweetness.  I rarely come across anything that is too sweet for my sweet tooth and the basically candied strawberry pancakes were it.  The next day I decided to give it a second try since I had leftover syrup and without the candied strawberries in the batter it was great.

The syrup had a fun pink tint to it due to the strawberries, however I'm not as handy with a camera as I am with a skillet.  The strawberry flavor was a nice light tone and not overpowering.  However if you'd like super strawberry flavor use more.  You can also use other berries, fruits, butter, maple or other extracts, only brown sugar, dark brown sugar instead of light, or only white sugar and other variations if you'd like a different flavor. 

I know what you are thinking "STOP JABBERING and get to the recipe!"  Your wish is my command....


Ingredients:
1 Cup Light Brown Sugar
1 Cup White Sugar
1 Cup Water
1 Cup Sliced Strawberries
2 Teaspoons Vanilla Extract

1 Large sauce pan, it needs boiling room.

Directions:
Put strawberries and brown sugar in sauce pan.
 
Over medium heat slowly stir in the water and stir constantly until brown sugar is dissolved about 1-2 minutes. The mixture will just be starting to get warm.

Slowly pour in white sugar while stirring and constantly stir until the white sugar is dissolved.

Turn heat to high bringing mixture to a boil for 2 minutes while constantly stirring.  
(Do not stop stirring at this point or it WILL overflow.  
If it starts to bubble too close to the top just lift off the burner 
for a few seconds until it pipes back down.)

Turn heat to medium low.

Add vanilla and stir.
 
Simmer for 15-25 minutes stirring often. I did it for 25, the longer the thicker it will be the shorter the thinner it will be.

Strain into a bowl.  Figure out something yummy to do with the strained fruit.

Use a funnel to transfer the syrup from the bowl to a mason jar or some other kind of containing/pouring device that will be convenient to transfer your super yummy syrup to your pancakes, waffles and other culinary awesomeness creations.

The syrup will keep for a few weeks in the refrigerator.  

Reheat in the microwave at 50% power until it's the desired temperature.
 
Text all of your friends and brag about what a domestic goddess you are because you just made homemade syrup and none of those store brands have anything on you.

Mmmmmmm!


Who would have thought homemade syrup was actually this easy?

I hope you not only enjoy eating it but enjoy making it!


Much love and super yumminess!


Thursday, November 24, 2011

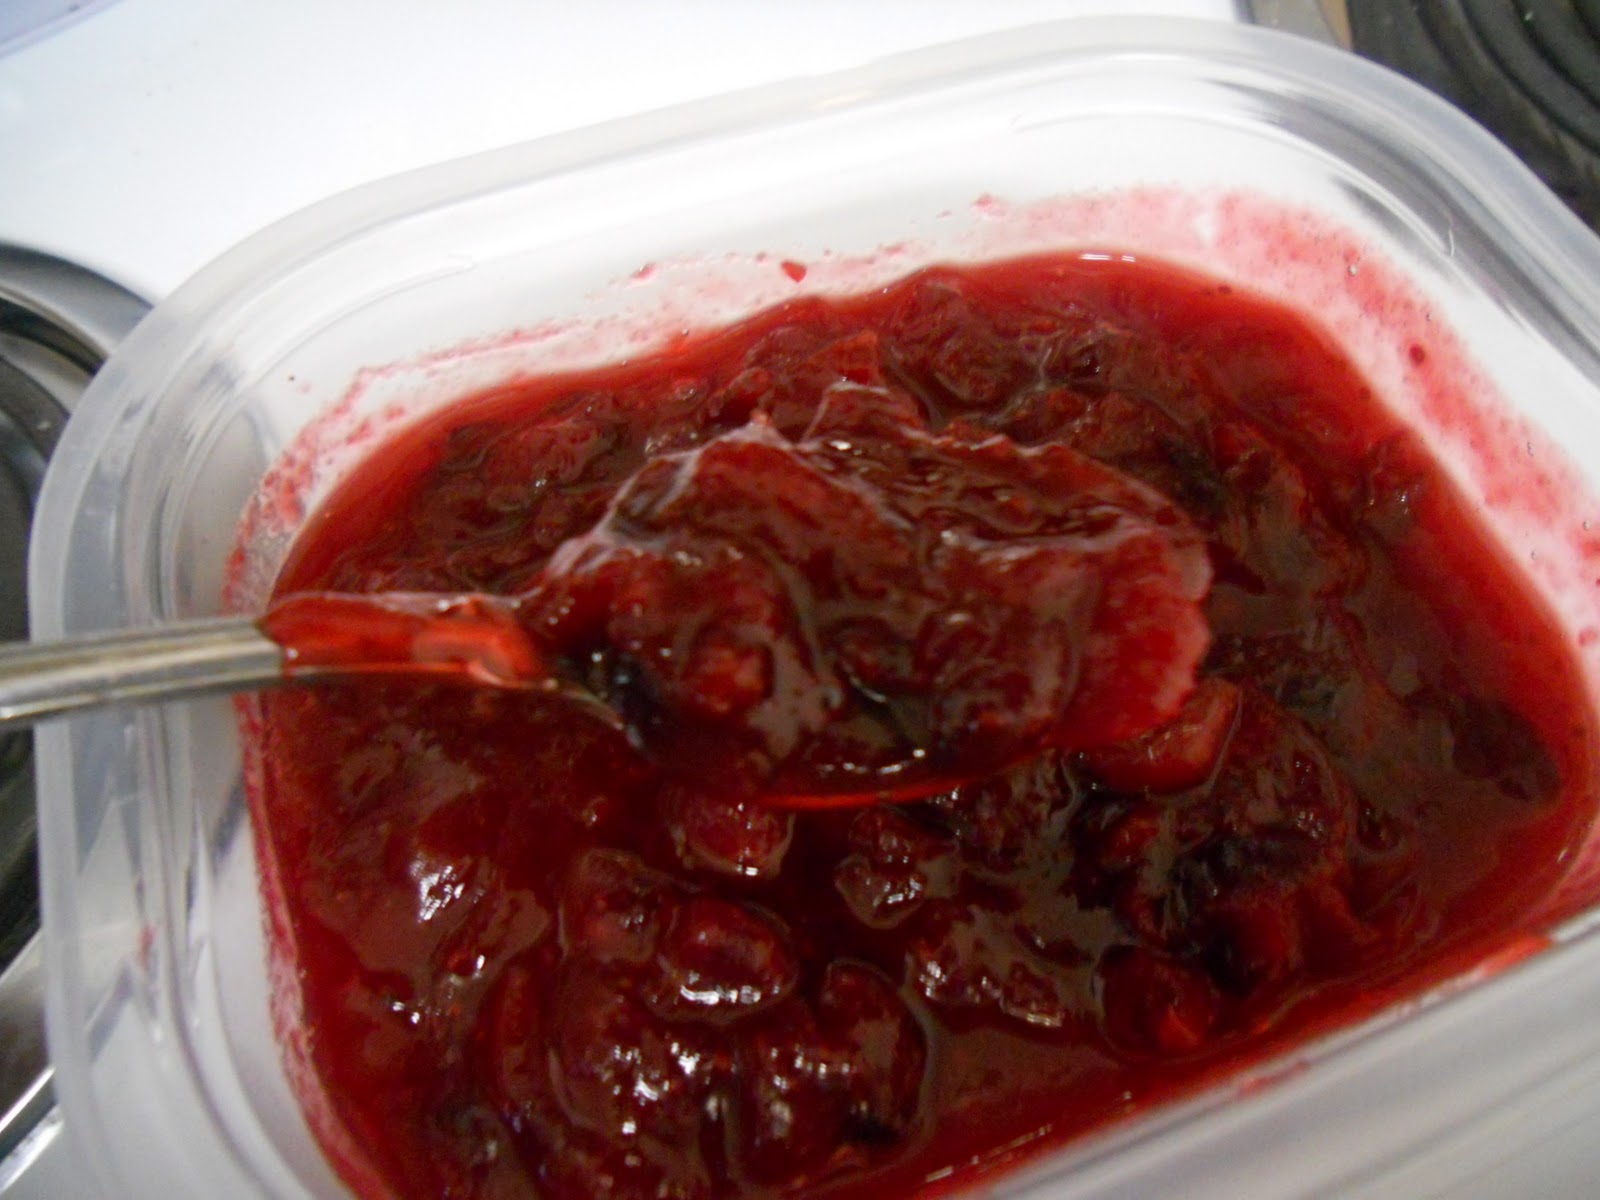
Homemade Cranberry Sauce

A few days ago I ran across a recipe for homemade cranberry sauce.  I had never even thought to try to make it and when I saw how easy it is I was like what!!!!!!  Cranberry sauce is one of my favorite additions to any holiday feast and I had to try it.  Even though I had already purchased some of the canned stuff I ran out and got fresh cranberries.


This is the same basic recipe that I saw on a million and one websites.  I made some earlier and it's so wonderful!  I'm pretty sure I'll never buy that canned stuff again.

Ingredients:
12 Ounces Fresh Cranberries
1/2 Cup White Sugar
1/2 Cup Brown Sugar
1 Cup Orange Juice

(Some people added cinnamon, I did not)

Directions:
Bring orange juice and sugar to a boil, stir frequently.
Add cranberries, reduce heat to medium, stir frequently.
Cook for 10 minutes.
Remove from heat.
Let cool then put in a bowl to gel in the refrigerator, for several hours or over night. It will thicken as it cools.

Yes it's that easy!!!

You'll hear these wonderful little popping sounds as the cranberries start to burst open.
I saw many people say they used a splash guard, so I put mine on at first but found I didn't need it since I used a pan deep enough that the concoction didn't pop out.
I also went ahead and added about 3 dashes of salt while it was cooking.

I also saw commentary on recipes where people had noted that they ran theirs through a food processor or used a hand mixer on it after it cooked to give it a smoother consistency. However I love the whole berries myself.

This made a little less than 2 cups of cranberry sauce, and it'll surely be a hit amongst your cranberry sauce lovers, so you may want to double or triple the recipe for a large group.

DO IT!!  It's so easy and yummy!!  Not to mention a beautiful addition to your holiday spread.  Your friends and family will be impressed that you were domestic enough to make it from scratch.  It can be our little secret how easy it really is. ;)

ENJOY!!

Much Love!  & Happy Thanksgiving!


Wednesday, November 23, 2011

Sweet Potato Casserole

Sweet potato casserole is a fantastic edition to any holiday menu!!  It's definitely one of my favorite dishes to make now.  So many years I went to Thanksgiving and other holiday feasts where the person who contributed the sweet potato dish came up with this bland from the can puree with nuts mixed in and topped with marshmallows.  Not that I did not enjoy it, however when you decide to try a homemade sweet potato casserole that actually consists of flavorful ingredients that make your sweet potatoes go boom pow in your mouth, you'll never want to go back to eating that can of sweet potato puree covered in marshmallows.  I just pulled mine out of the oven and it's so tempting to dive in now!
 
I'm not sure how large the ones you have there are, but the ones here are to me about a medium size and so it's about 8 sweet potatoes to come up with about 8 cups give or take a little.  I've never weighed them out or I'd tell you that, I just eyeball it. =)  Also do not forget to take your butter out of the refrigerator about half an hour to an hour before you want to use it so it will be soft and workable!
 

Ingredients:

Casserole:
8 Cups Quartered Fresh Sweet Potatoes
1 Stick (8 Tbls) Softened Butter (I prefer unstalted.)
2 Eggs
3/4 Cup White Sugar
1/4 Cup Orange Juice (I use 1 Fresh Orange for juice.)
1/4 Cup Milk or Cream
1 Tsp Vanilla
1/2 Tsp Salt
1/2 Tsp Cinnamon
1/4 Tsp Nutmeg
1 Cup Pecans (Optional)
 
Topping:

1 Cup Brown Sugar
2/3 Cup Flour
Couple of dashes of cinnamon.
6 Tbls Softened Butter (Again I prefer unsalted.)

Directions:

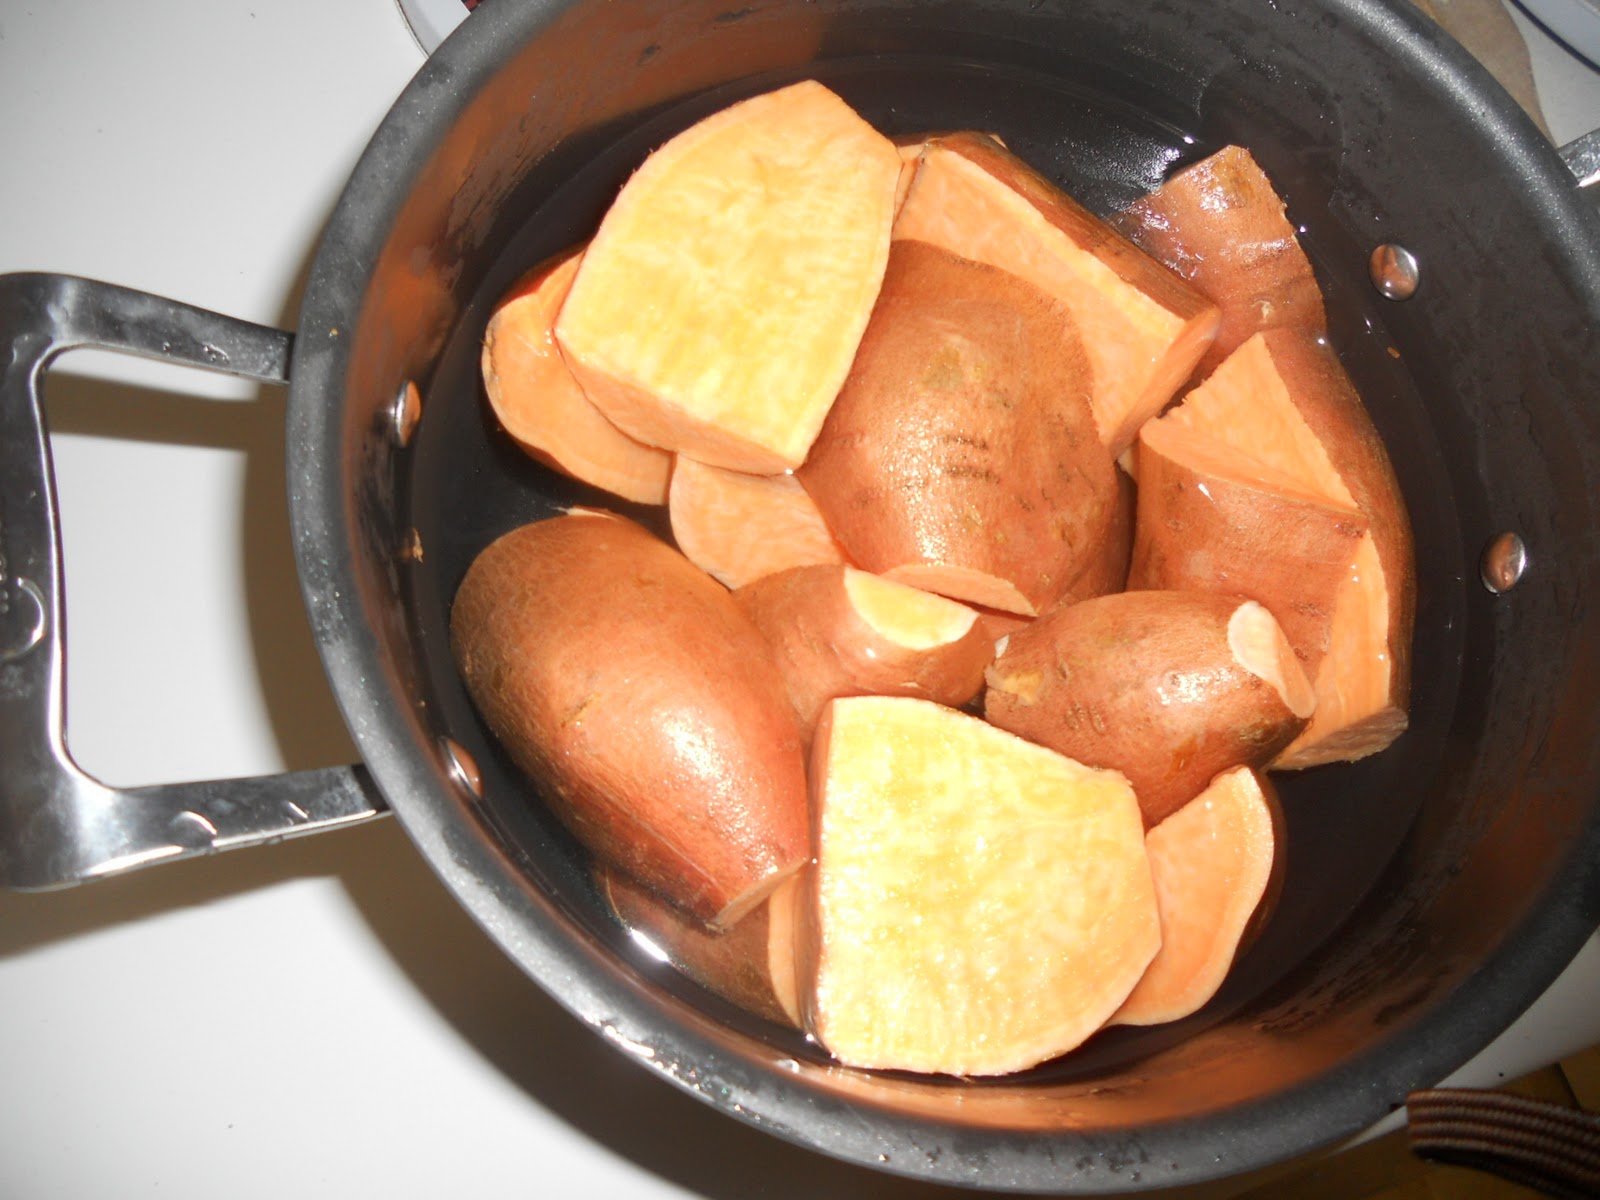
First up you want to wash the sweet potatoes.  Then cut the ends off of your sweet potatoes and cut the the potatoes into quarters. Put them in a big pot, peels still on, cover with cold water and then bring them to a boil.  Boil until they are tender, mashing consistency, and the peels are starting to pull away.  (Some people prefer the flavor of baked over boiled, if that is you go for it!)

Drain the water and let them cool until you are able to handle them, about 15-20 minutes.  Pull the peels away and cut out any eyes (hard black spots). 

Preheat oven to 350 degrees.

In a large bowl mash the sweet potatoes.


Add butter, mash or stir it in until it's pretty much completely incorporated into your potatoes.

Add the rest of your ingredients except for the pecans and stir well.


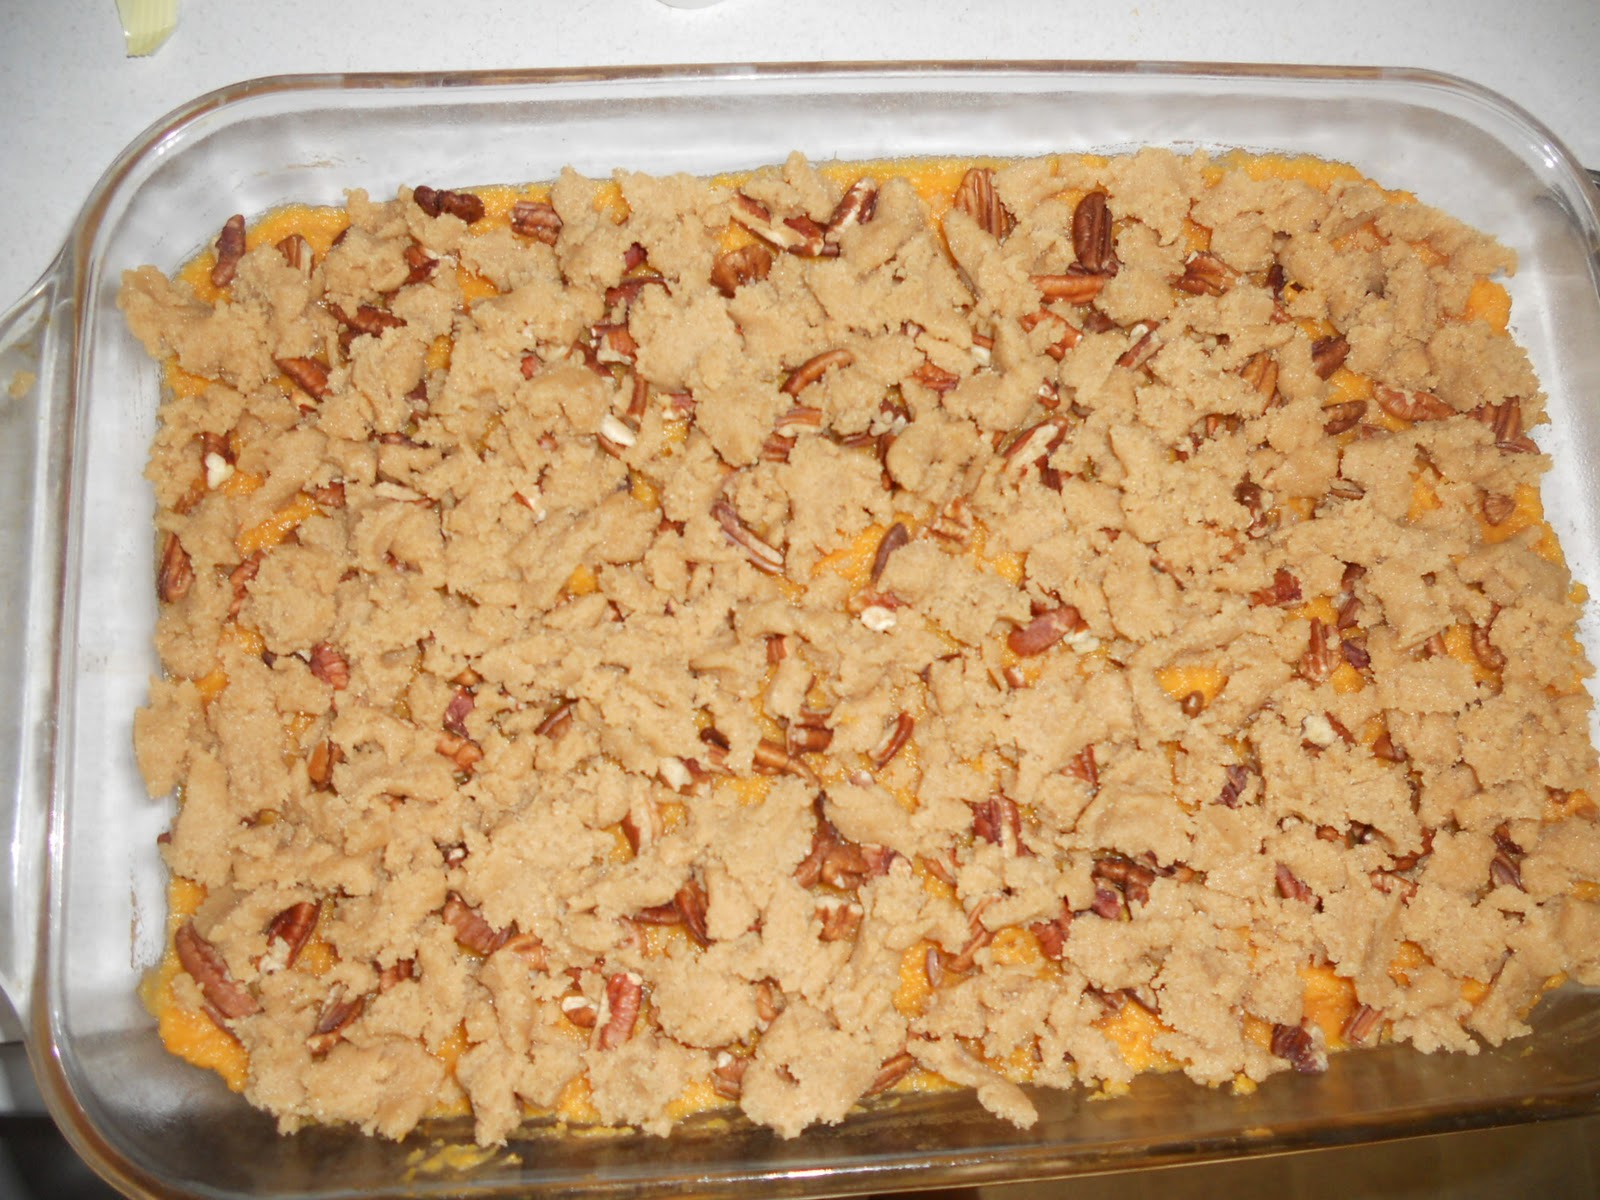
Spread the sweet potato mixture into a 9x13 baking dish.  (I like to do a light spray of canola oil into the baking dish before adding the mixture for easier clean up later, but it is not necessary.

Top with pecans.


Now mix your brown sugar, cinnamon and flour for the topping.  Then use a fork to turn in the butter into the dry ingredients until they are completely mixed and a nice moosh.

Sprinkle the topping over the top of the pecans. If you like less crunch and sugar on top only make a half recipe of the topping.


Bake for about 30-35 minutes until the topping is crispy and starting to brown.


Some people just prefer marshmallows, if that is you, skip the topping, throw on your marshmallows and cook until they are melting and starting to brown.

A couple of years ago I was actually requested to make a sweet potato casserole with  marshmallows covered in a crispy topping... hmmm!  I did my best, I covered it with mini marshmallows. Mixed roughly guessing now (I did not write it down) 1/4 cup brown sugar, 1/4 cup white sugar, 1/4 cup flour, and about 2 tbls of butter, creating a more granulated mixture. Sprinkled over the top and this is what came out.  It was actually devoured by all and insanely praised.  One of those things I'm not sure if I'd ever be able to recreate! =)


I hope you and your guests enjoy!
 
Much Love!   And Happy Thanksgiving Eve!!


Monday, November 21, 2011

Brine That Turkey

Several years ago I was watching one of my domestic goddess heroes, Martha Stewart, while she was putting on a Thanksgiving special.  Luckily it was several days before Thanksgiving because she did something I had never seen before... brined the turkey!

I was immediately fascinated and had to try it that year.  It was the best most magically wonderful turkey I'd ever made.  Juicy, flavorful, practically falling off the bone and melting right into your mouth.  Every year since I have made sure my turkey is in the brine before it's roasted.  This has become a tradition now and my brine has evolved over the years because I've done lots of reading of different recipes and techniques.  I'm not actually going to share all of my brine ingredients with you because then my turkey isn't as special if you use them too. ;)  However below I'll post some brine recipes for you to check out and try or build your own recipe off of.

You may be thinking... "what does brine the turkey even mean??  This is madness, a turkey that melts in my mouth and has flavor, I do not understand."

Trust me... It's easy!!!  And more importantly, worth it!  Basically you are soaking your uncooked turkey for 12 hours in a solution of salt, sugar, spices, herbs and other aromatics.  Be warned too much salt or letting your turkey sit in the brine too long can cause a tough not so great turkey. So when you are looking at recipes do not think, well the more salt I add the better or the longer its in the better it will be.  This is the kind of thinking that will result in people wanting to slap you as they try chewing on their Thanksgiving turkey jerky you've fed them.

Tonight kicks off the beginning of my brine process.  First I've brought to a boil fresh cold tap water with my special blend of spices... oh yeah... that's my brew.  I will be letting this cool completely and then putting it in the refrigerator so that it can become very cold over night.


 This 4 gallon bucket is my brine bucket.  It's never used for household cleaning chores.  I like the square shape of it because the awkward shape of the turkey slides right into it for full submersion.  Your turkey being fully submersed is a must for even brining.  If you cannot find a bucket big enough use an ice chest but make sure to bleach and wash it well before and after the brine process, and you will be adding a bag of ice to your brine.  However as long as you are not buying giant turkeys a bucket should suffice. 

Tomorrow what is going to happen is the 13 pound turkey pictured above will be coming out of that wrapper, giblets removed, and turkey thoroughly washed.  Then it will be placed in the brine solution that I boiled and let cool tonight and my herbs and other aromatics will be added.  Finally I will be putting a heavy plate on top to keep the turkey weighed down and fully submersed and refrigerating it.


When you take the turkey out of the brine make sure to properly discard of the liquid as well as all spices, herbs, etc that were used.  Do not use any of it to cook with!  Use fresh herbs, spices, etc when cooking.

I will be putting the turkey in the brine about 13 hours before I plan to have it in the oven to start cooking.  It will only be in the brine for about 12 hours, and the other hour is to let it come to about room temperature for extra juicy goodness, and that is a great time rub some oil of your choice into the skin.  As well to chop any onions, herbs, apples, citrus, etc that you plan to season the turkey with while cooking.


This is a wonderful fresh herb roasted turkey from a couple of years back.  Even with a horrible oven that was on it's last leg and did not heat properly I was still able to produce a nicely browned turkey with a crispy flavorful skin and juicy wonderfully flavored meat.


Warning!!  If you cook a fantastic brined turkey for your friends and family you may forever be dubbed the official Thanksgiving turkey baker and be requested upon to bring it year after year.


Seriously watch this video it's pretty great and gives you some really good tips on not only turkey brine, but turkey in general!


Some Turkey Brine Recipes

Martha Stewart's How To Brine A Turkey
Martha actually has several brine recipes on her site.
Alton Brown's Good Eats Turkey Brine
Food Network's Collection Of Brine Recipes (26)
Sheri's AllRecipes.com Turkey Brine
There are countless recipes out there!  Just do a basic internet search keyword "Turkey brine recipe"
Have fun with it and use ingredients you love and you will have an awesomely seasoned turkey!

Now that you know what's what, get your brine going!

Much love!


Sunday, November 6, 2011

Pineapple Upside-Down Cake

One of my favorite cool weather cakes to bake is pineapple upside-down cake.  It's fantastic warm and melts in your mouth.

I had this great recipe that I used for years however was unable to find it this round, and though I could have done it by memory I decided to look at one of my favorite recipe websites, allrecipes.com, and found this recipe that had over 400 reviews of positive feedback and almost 10,000 people have saved it to their recipe boxes, Anne's Pineapple Upside-Down Cake VII.  It uses a lot more brown sugar than I'm accustomed to using and called for a cast iron skillet which I do not have, however I thought I'd tackle it anyways, and of course give it my own little tweaks that I've incorporated over the years of baking them.


Pineapple Upside-Down Cake VII

Prep Time: 20 Minutes
Cook Time: 45 Minutes
Ready In: 1 Hour 5 Minutes
Servings: 12
"This pineapple upside down cake is made in an iron skillet. It's quick, easy and so beautiful."
Ingredients:
1/2 cup butter
1 1/2 cups brown sugar
1 (20 ounce) can sliced pineapple
10 maraschino cherries
1 (18.25 ounce) package white cake mix
Directions:
1. Melt the butter over medium high heat in the iron skillet. Remove from the heat and sprinkle the brown sugar evenly to cover the butter. Next, arrange pineapple rings around the bottom of the pan, one layer deep. Place a maraschino cherry into the center of each pineapple ring. Prepare the cake mix as directed by the manufacturer, substitute some of the pineapple juice for some of the liquid in the directions. Pour the batter over the pineapple layer.
2. Bake as directed by the cake mix directions. Cool for 10 minutes, then carefully turn out onto a plate. Do not let the cake cool too much or it will be stuck to the pan.


My tweaks:
  • As mentioned before I do not have a cast iron skillet so I just used a 9x13 glass cake pan.
  • I used yellow cake not white cake.
  • I soak the pineapple slices in about 1/3 of a cup of spiced rum in a zipper bag or a plastic bowl with a lid, shake them or turn them every so often to get even soaking, the longer the better, try at least an hour to overnight.  Still save your juice from the can!
  • Replace some of the liquid called for in the cake mix recipe with the rum from the pineapple soak and then the rest with the leftover canned pineapple juice and finally water if you need more liquid.
  • I place cherries in the voids around the edges of the pineapple rings and around the edges of the pans this way you get your full cherry satisfaction.
Flipping tip: If you've never made an upside-down cake of any sort the easiest way to make your flip without resulting in a pile of mess... place the dish you are turning your cake onto on top of the pan you baked in, and then flip placing your dish on to the counter, I like to give the pan a few pounds of the palm on the bottom in case there are any lingering pineapples or cherries, however if you do not let it cool too long it should not be an issue, then remove your pan and find a perfectly flipped beautiful cake.

I did somehow manage to think to take a quick shot of the cold
yummy leftovers before they were dished out.
This cake turned out absolutely delicious!  It looked so good and I didn't even think before we cut into it to take a picture of it fresh and hot for the blog I was sure I'd be writing.  But who can blame me, our mouths were watering and we were intoxicated by the smell. 

It melted in our mouths and the large amount of sugar formed the perfect crispy crusty wonderfulness around the edges of the pineapples.  I will definitely be purchasing a cast iron skillet to try to make this in as well.  One of my coworkers told me that is how her grandmother had done it and there is no other way to eat them.  I found that Amazon has a 12-Inch Pre-Seasoned Skillet that looks perfect at a great price and eligible for free shipping.  I cannot wait to try this again in that skillet!

If you've never tried to make a homemade pineapple upside down cake it's truly an easy cake to make and is so yummy it will have your friends and family in awe of your Domestic Goddess skills.  Give it a try and you will not be sorry.

Much Love!!

Wednesday, November 2, 2011

Cheese Fudge?

Yes I said it!  Cheese fudge!!!  How can you go wrong, cheese and chocolate, brilliant!  It's that time of year when people like to test their sweets making skills so I thought I'd share this recipe.  I didn't make this myself, however a coworker made some for our office Halloween bash.  It was different and good and I couldn't for the life of me figure out what was different about it, I thought perhaps she had put cream cheese or sour cream in it or something.  This is definitely worth a try and will make people wonder what your special ingredient is.  Make it fun and have people try it and then ask them to guess what your secret is, they will be less likely to turn their nose up to it before trying, and they will be amazed at the power of the goodness of cheese.

Enjoy!
Much Love!!

She took the recipe from Paula Deen - Queen of Butter - Chocolate Cheese Fudge.

(The processed cheese that my coworker used was Velveeta brand.)

Servings: 6 to 8 servings
Prep Time: 30 min
Cook Time: 10 min
Difficulty: Easy

Ingredients

1/2 lb processed cheese, sliced or cubed
1 cup butter
1 teaspoon pure vanilla extract
1 cup chopped nuts, pecans, walnuts
2 16-ounce boxes confectioners’ sugar
1/2 cup cocoa

  • Spray lightly the bottom of a 9x2 inch square pan with a nonstick spray.
  • Using a saucepan over medium heat, melt the cheese and butter together, stirring constantly until smooth.
  • Remove from heat and add the vanilla and nuts.
  • In a large bowl sift together the sugar and cocoa. Pour the cheese mixture into the sugar and cocoa mixture and stir until completely mixed. The candy will be very stiff.
  • Using your hands, remove candy from bowl and press evenly and firmly into pan. Because of the amount of butter in this recipe, pat the top of the candy with a paper towel to remove the excess oil. Place pan in refrigerator until candy is firm.
  • To serve candy, cut into squares.

 Are you a fan of Paula Deen?  Amazon has a huge collection of her cookbooks, cookware, and accessories at discount rates and most qualify for Free Super Saver Shipping! Click here for your Paula Deen connection.


Sunday, October 30, 2011

Not So Lazy Sunday

Today I woke up and have been on the go since.  I haven't even had time to think of an actual topic driven blog for today.  Laundry, grocery shopping, dog walking, iguana petting and ball dipping.  The details of the actual ball dipping is a blog all of it's own to come at a later date.  Today was my first time making the ever popular new fad cake balls.  I baked two cakes for these balls for the work Halloween bash being held on Tuesday, because not everyone will be there tomorrow on actual Halloween or something like that.  I've made my first batch of balls and I'm over it, and I have a whole nother batch of balls to go.  I have ball delirium.  I need to hire a little unsuspecting person at my apartments and tell them if they dip my balls they get to keep some of the balls.  Now I'm just going to vegetate for the rest of the night try to forget the balls and the rest of the balls will be finished tomorrow.  The ball project has been fun but tedious.  Whoever thought of the cake balls was brilliant, for one they are yummy for two I just got to reference balls 14 times in one blog.  I hope everyone has had a wonderful weekend and that Monday is kind to them.
 
 Much Love!!
 BALLS!(15) These are some of the ones I've made so far.


Sunday, October 23, 2011

Cool Weather Cooking

I think most people who love to cook would probably agree that when the weather cools down it's time to do some serious cooking.  This is probably why so many people pack on the pounds during the fall and winter.

This year to avoid that cool weather padding I'll be participating in some indoor workout routines, hopefully it helps keep those extra pounds away, and with all that internal body heat maybe I'll save some money on my electric bill not running my heater as often.  I've also picked up a couple of new recipe books that have glycemic index recipes for some new healthier choice options.

This morning I was waiting on my coffee and I noticed my stack of cookbooks on top of the microwave.  Oh yes, the past few mornings have been the first cold ones for me and now cool weather cooking mode is commencing. 

I'm now sitting here thumbing through my stack of cookbooks armed with a pen, pencil, highlighter, sticky notes, and sticky flags marking recipes, making notes, and compiling a cooking wishlist.  I've had some of these books for years and sometimes new things I never noticed before jump out at me and scream 'Cook Me Cook Me'! 

Soups, stews, casseroles, slow cooker creations and more!  Seasonal yummies at their peak cranberries, apples, citrus, sweet potatoes, cabbage, broccoli, cauliflower!  In the near future I'll be making one of my Fall fallback favorites, pork chops with an apple and cranberry sauce... it's on!

What are some of your favorite Fall and cool weather dishes?  Send me recipes!

Much love and happy cool weather cooking!

Friday, October 21, 2011

Omelet Night!

Yesterday one of my wonderful coworkers brought in some freshly laid eggs from his chickens.  Fresh eggs are undoubtedly the most awesome of all eggs.


Later in the day I remembered that a few weeks ago another fantastic coworker had brought me a jar of homemade Concord Grape jelly that was made from the grapes her father grows on his farm in Kentucky. 

I was never a grape jelly fan, however I had never been exposed to homemade grape jelly - I'm now a fan!  It's not overly sweet and it tastes like grapes, unlike the mock grape flavor infused sugar as you buy in the grocery store.


I decided I must have an omelet with these fantastically colored eggs.  And it had to be just a simple cheese omelet so that the flavor of the fresh eggs would be the star, not the filling/toppings. And the perfect complement would be biscuits with that wonderful grape jelly.


A basic light and fluffy wonderful Bisquick drop biscuit.   When you are a working woman who doesn't have time to roll out the homemade, but want fresh hot biscuits with the satisfaction of at least mixing them yourself this is the way to go. 2 minutes prep, 8 minutes cook and you feel like you've accomplished awesomeness.


If you are unsure of how to make an omelet  below I will paste a basic recipe I found from the web that uses the same technique I've figured out after years of trial and error. Follow the directions and it will be perfect.  It cannot get any easier than that.
*************************************
Cheese Omelet on the Food Network

Ingredients

  • 3 large Grade A eggs
  • 2 slices American cheese
  • 2 tablespoons vegetable oil

Directions

Equipment: 9-inch non-stick skillet and an immersion blender

Add oil to the skillet over high heat, and heat it until small hairline ripples appear on the surface of the oil.

Break the eggs into tall glass or frappe cup and whisk to blend for 1 minute. (The Waffle House uses a 15,000 rpm malt shop mixer.)

While moving the skillet in a circular motion, pour in the eggs. Continue to move the skillet in a circular motion, allowing the outside of the eggs to cook and fluff up. When the outside edges have firmly cooked, flip the omelet and cook on the other side for approximately 30 seconds. Keep moving the pan in a circular motion, but not as often as before it was flipped. (Too much movement at this time will cause the omelet to fall.) Flip the omelet once more to finish cooking--no more than 30 additional seconds.

Overlap 2 slices of American cheese in the center of the omelet in a diamond shape.

Fold the omelet in half, being certain to cover the cheese slices, and slide it onto your plate.
*************************************
My Personal Notes:
  • Do not add milk to your eggs for whatever reason it is people add milk.  Don't believe me, read this Why not to put milk in eggs.  Notice the awesome yellow color of my omelet.
  • I do not have the recommended blender device... I went old school with your good old bowl and a fork and beat the dickens out of my eggs for 60 seconds.
  • I did not use cheese slices as they suggested. I had shredded cheese which worked beautifully and even sprinkled a little on top for the fun of it.  
  • Notice you are not melting your cheese into the omelet while in the pan. If you try to do this it will dry out your eggs.  They are saying put in your cheese fold and take out of pan, it's a quick process. 
  • I personally, to not risk egg dry out, have my cheese prepared in advance then when they are done flip my eggs onto the plate so the hotter skillet side is up and toss in the cheese and fold. The heat and steam of the hot eggs will melt it perfectly within a minute or so as it cools.  
    • This also goes for if you were using other fillings such as vegetables, meats, etc... precook your fillings because they will take longer than your eggs, keep them on warm covered so they are nice and hot and throw in the middle of your hot egg as soon as it hits the plate and top with your cheese then fold.
      • Let's say you missed getting everything into the omelet before it lost it's hot steamy cheese melty abilities... do not fret and do not stick it back in the skillet to dry it out. Just put it in an oven safe dish and cover tightly with foil and pop it in the oven at a low temperature for a few minutes and it will retain it's fluffy moisture.
  • What does circular motion mean? You are not sliding your pan around on top of the burner in circles (or I don't). Slightly lifting up the handle holding the pan at an angle and gently making your eggs slurry around in circles in your pan by constantly moving your angle.
  • Pop and air bubbles with the corner of your spatula and keep circling.
  • Make sure you have a rather large spatula for your flipping and your eggs will be less likely to fold when you flip.
  • And finally be kind to your non stick pans - Only use a plastic or wooden spatula and your skillet will thank you!
When it comes down to it everyone has their own style. I know some people are reading this and thinking NO NO NO that's all wrong!  But hey....


My omelet was fluffy, moist, and the farm fresh egg taste was rich and wonderful!  And biscuit with that jelly... oh man that jelly!!!  Now that you've been shown the basics mix it up and try your hand at an omelet this weekend!

Much love and HAPPY FRIDAY!

Do you have omelet cooking tips I should try? Let me know!