Showing posts with label Turkey. Show all posts

Monday, November 21, 2011

Brine That Turkey

Several years ago I was watching one of my domestic goddess heroes, Martha Stewart, while she was putting on a Thanksgiving special.  Luckily it was several days before Thanksgiving because she did something I had never seen before... brined the turkey!

I was immediately fascinated and had to try it that year.  It was the best most magically wonderful turkey I'd ever made.  Juicy, flavorful, practically falling off the bone and melting right into your mouth.  Every year since I have made sure my turkey is in the brine before it's roasted.  This has become a tradition now and my brine has evolved over the years because I've done lots of reading of different recipes and techniques.  I'm not actually going to share all of my brine ingredients with you because then my turkey isn't as special if you use them too. ;)  However below I'll post some brine recipes for you to check out and try or build your own recipe off of.

You may be thinking... "what does brine the turkey even mean??  This is madness, a turkey that melts in my mouth and has flavor, I do not understand."

Trust me... It's easy!!!  And more importantly, worth it!  Basically you are soaking your uncooked turkey for 12 hours in a solution of salt, sugar, spices, herbs and other aromatics.  Be warned too much salt or letting your turkey sit in the brine too long can cause a tough not so great turkey. So when you are looking at recipes do not think, well the more salt I add the better or the longer its in the better it will be.  This is the kind of thinking that will result in people wanting to slap you as they try chewing on their Thanksgiving turkey jerky you've fed them.

Tonight kicks off the beginning of my brine process.  First I've brought to a boil fresh cold tap water with my special blend of spices... oh yeah... that's my brew.  I will be letting this cool completely and then putting it in the refrigerator so that it can become very cold over night.


 This 4 gallon bucket is my brine bucket.  It's never used for household cleaning chores.  I like the square shape of it because the awkward shape of the turkey slides right into it for full submersion.  Your turkey being fully submersed is a must for even brining.  If you cannot find a bucket big enough use an ice chest but make sure to bleach and wash it well before and after the brine process, and you will be adding a bag of ice to your brine.  However as long as you are not buying giant turkeys a bucket should suffice. 

Tomorrow what is going to happen is the 13 pound turkey pictured above will be coming out of that wrapper, giblets removed, and turkey thoroughly washed.  Then it will be placed in the brine solution that I boiled and let cool tonight and my herbs and other aromatics will be added.  Finally I will be putting a heavy plate on top to keep the turkey weighed down and fully submersed and refrigerating it.


When you take the turkey out of the brine make sure to properly discard of the liquid as well as all spices, herbs, etc that were used.  Do not use any of it to cook with!  Use fresh herbs, spices, etc when cooking.

I will be putting the turkey in the brine about 13 hours before I plan to have it in the oven to start cooking.  It will only be in the brine for about 12 hours, and the other hour is to let it come to about room temperature for extra juicy goodness, and that is a great time rub some oil of your choice into the skin.  As well to chop any onions, herbs, apples, citrus, etc that you plan to season the turkey with while cooking.


This is a wonderful fresh herb roasted turkey from a couple of years back.  Even with a horrible oven that was on it's last leg and did not heat properly I was still able to produce a nicely browned turkey with a crispy flavorful skin and juicy wonderfully flavored meat.


Warning!!  If you cook a fantastic brined turkey for your friends and family you may forever be dubbed the official Thanksgiving turkey baker and be requested upon to bring it year after year.


Seriously watch this video it's pretty great and gives you some really good tips on not only turkey brine, but turkey in general!


Some Turkey Brine Recipes

Martha Stewart's How To Brine A Turkey
Martha actually has several brine recipes on her site.
Alton Brown's Good Eats Turkey Brine
Food Network's Collection Of Brine Recipes (26)
Sheri's AllRecipes.com Turkey Brine
There are countless recipes out there!  Just do a basic internet search keyword "Turkey brine recipe"
Have fun with it and use ingredients you love and you will have an awesomely seasoned turkey!

Now that you know what's what, get your brine going!

Much love!


Monday, November 7, 2011

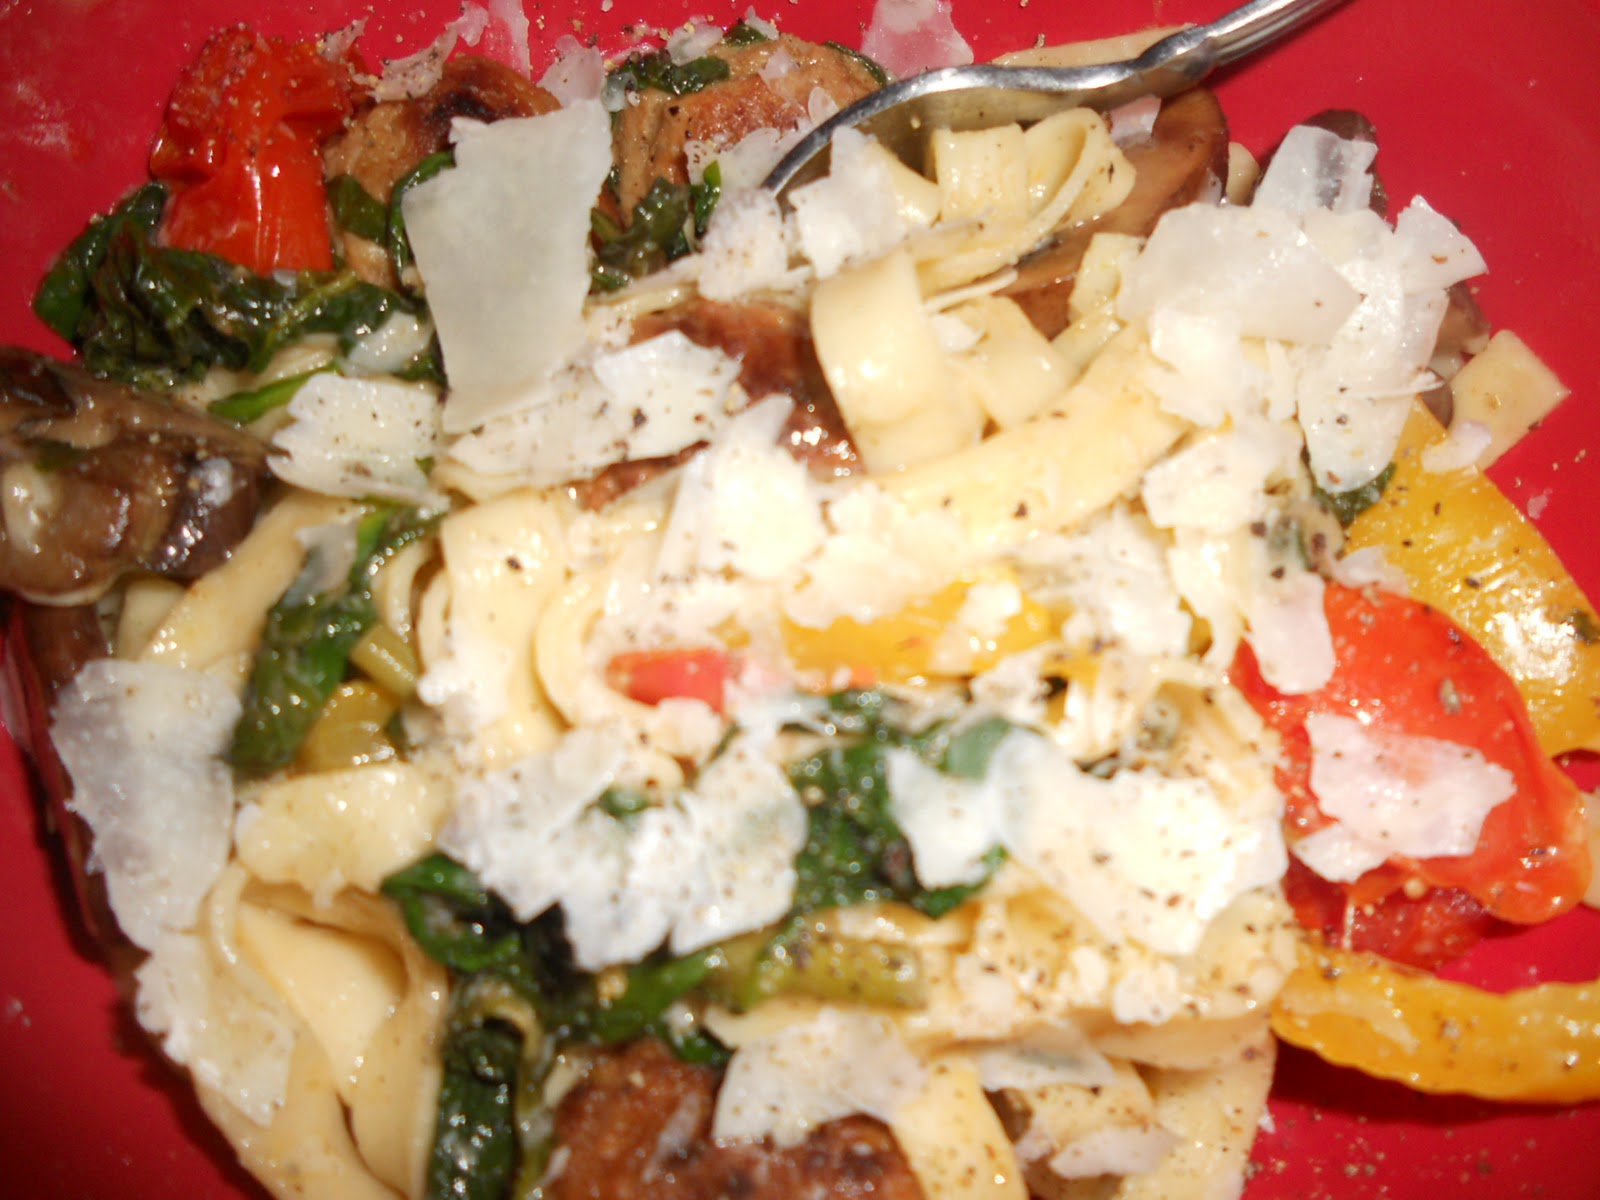
Fettuccini With Turkey Meatballs And Vegetables

Last night I cooked a fabulous pasta dinner that was beyond fantastic.  I had been searching for a pasta dish that was different, not the same typical pesto, tomato or Alfredo sauce.  I kept seeing recipes that looked good but not quite what I wanted.  Finally I decided to just use ingredients and techniques of various recipes I had found.  Time for a blonde girl spin.


Ingredients:

1 - 14 ounce Package of Armour Turkey Meatballs - Thawed
1 - Pint Grape or Cherry Tomatoes -Whole
1 - Bell Pepper (I used yellow for color contrast) - Sliced
1 - 8 ounce Package of Baby Bella Mushrooms - Sliced
1 - 9 ounce Package of Buitoni All Natural Fettuccine
1 - 9 ounce Package of Spinach - Whole Leaf (Or Baby Spinach)
1 - Package of Fresh Basil (1/2-3/4 cup) - Largely Chopped
1/2  cup Parmesan Cheese, Shaved
1 Bottle of Extra Virgin Olive Oil to keep handy.
Salt & Pepper to taste

I used Baby Bella Mushrooms, you can substitute with white mushrooms, however Bella's give you such a flavor punch that white do not.  I use the Buitoni Fetuccine because their fresh pastas, that you can find in the dairy section of the grocery store, just have such a better flavor and texture than your typical dried pasta, not to mention it cooks in less than half the time.  The fresh basil gives an incredible flavor, you do not want to skip it, you'll find it in the packaged fresh herb section of your produce section.  Unfortunately I didn't think to measure the Extra Virgin Olive Oil and eyeballed that part so I'll have to just give you guesstimates on how much I used and you'll have to figure out what works for you.  Have fun and use your favored vegetables or a different kind of meatballs in your dish, this is just what I used and it was great!  You'll be surprised at how flavorful the Turkey Meatballs are if you've never used them before, and they are not greasy at all.

Directions:
  • Preheat oven to 425 degrees F.
  • Start pot of the water on the burner to come to a boil for the pasta, use amount of water called for on the package. While waiting on the water to boil start the next step.
  • Coat the tomatoes, bell pepper, and mushrooms in about 2-3 tablespoons of the olive oil and a light sprinkle of pepper.  Spread out on a baking sheet and put in oven for 10-15 minutes until the mushrooms and bell peppers are the cooked consistency you like, I personally like a little crunch, the tomatoes will start to burst or shrivel, stir after about 6 minutes.
  • Put pasta in the boiling water, if you are using the Buitoni it should take 3 minutes exactly, set a timer, you do not want to overcook your pasta. Drain and reserve 1/2 cup of the water.
  • In a Paella pan or large skillet on medium high brown the meatballs in about 1 tablespoon of olive oil.
  • Once meatballs are nicely browned turn the heat to medium and add the entire package of spinach and 1 more tablespoon of olive oil.  It will look like a lot but it cooks way down.  Constantly stir and flip until your spinach has shrunk down.
  • By now your roasted vegetables are done, dump them into the pan with the meatballs and spinach, stir. 
  • Add pasta and 1-2 tablespoons of olive oil and toss together.  I found using a large wooden fork and a wooden spatula worked great.  Start with the smaller amount of olive oil and add more if it seems your pasta is sticking together.  Part of any stickiness will be resolved in the next step though.
  • Dump the Basil and Parmesan cheese and the pasta water on top.  Toss well until the basil and cheese are well incorporated, cheese is starting to melt, and the water has pretty much been absorbed, add more olive oil if needed.  Salt and pepper to taste.
  • Remove from heat and serve immediately.  Top with Parmesan cheese and salt and pepper if you desire.
This dish will feed about 4 people, or 2 people who somehow have room for seconds.  I did not find that I needed anything else because this meal was very flavorful and filling.  Though I'm sure sides of salad and a nice baked bread brushed in olive oil and covered in an Italian cheese blend then baked until melted would be perfect compliments at a dinner party.  Though it may sound difficult and look like something that is a result of heavy labor, it was actually really easy to make, and will surely be a welcome change if your bored with the same old pasta dish.

Be creative with cooking and experiment, you never know what kind of awesomeness you'll come up with! 

Much love and Enjoy!!

Be kind to your non stick pans - Only use a plastic or wooden cooking utensils and they will thank you with a long life.  Amazon Cooking Utensils